Background
If you work on computers for extended periods of time, you’ll find yourself reaching for the mouse countless times. Many claim that constant mouse usage can contribute to Repetitive Stress Injuries (RSI) and other issues with one’s fingers, hands, wrists and forearms. The National Health Services (NHS) of the UK writes the following suggestion to avoid such injuries:
use keyboard shortcuts instead of the mouse to navigate and execute commands
Some of the first computer shortcuts users learn involve the moving and resizing of windows. These shortcuts may be ALT + TAB / CMD + TAB to cycle through windows or WIN + <arrow key> to snap windows left, right and full screen. What’s great about these keystrokes is that they will drastically reduce the amount of times we need to reach for the mouse. The idea behind Tiling Window Managers takes these keystrokes to the next level, granting us even more control over our windows and reducing our reliance on the mouse.
Tiling Window Managers
Tiling Window Managers allow us full control over our windows, all from the comfort of our keyboard. Additionally, most allow the users to fully customize their controls. My personal favorite Tiling Window Manager is i3 or i3 gaps.
i3
Monitor Dividing
Tiling Window Managers generally rely on the same concept of leveraging your monitor’s real estate space as efficiently as possible, while never moving your hands from the keyboard. When you’re using i3, the first window you open will be designated all of the monitor’s real estate. This is essentially like treating your program as if its in full screen automatically. Once you open your second window, your monitor’s real estate will be divided equally between the two windows. This process will continue, equally dividing real estate between all open windows.
A high quality image of three images sharing equal space might look like:
What’s fantastic about this is i3 also provides key strokes for changing which window has focus, allowing you to avoid touching the mouse. One can make windows split horizontally as well:
Additionally, one can mix the vertical and horizontal splitting:
Full Screen Mode
A simple feature is the ability to temporarily make the active window full screen, and then return it back to its original position. This is handy if you have a temporary task that would benefit by focusing on that specific window.
Virtual Workspaces
In additional to being able to split windows on your monitor, you can also leverage i3 to move windows between monitors and even open workspaces, which can be thought of as virtual monitors. My computer setup leverages three monitors, where the left and right monitors are in portrait mode and the middle one is in landscape. I reserve two virtual workspaces, 1 and 2 for the left monitor, where I host windows like Slack, Discord, MS Teams, Spotify and Email. My middle monitor has virtual monitors 3, 4, 5, 6, and 7 reserved. For my work laptop, each workspace is reserved for a specific client. For my personal machine, I do not have specific workspaces in mind and generally just go with the flow. My right monitor houses workspaces 8, and 9 and primarily houses an instance of Obsidian, for note taking.
Another useful thing to know is one can also use the keyboard to swap between these workspaces or move windows between workspaces, even if they’re on different monitors.
Floating Mode
Sometimes you might find that you want a window to not be restricted to the rigid grid system that i3 leverages. i3 allows one to make the currently active window enter “floating mode” which means the window will be removed from the grid system and actively “float” on top of everything. I don’t typically use this feature unless its with Scratch Pads, which we’ll now introduce…
Scratch Pads
i3 Scratch Pads is the newest feature I’ve been using and I have to say, I’m sad I did not experiment with them sooner. Scratch Pads allow you to take a floating window and easily hide and unhide it. I cannot overstate how incredibly useful this is. Here’s a small example, imagine you have your source code editor open on the left and terminal open on the right to run your code. In this scenario, imagine you’re referencing documentation periodically in a web browser. To have this window up the entire time might be seen as a waste of space. Instead, we’d like to reference it for a few moments, and then bring our attention back to our terminal and editor. We can make the web browser our active window and then make it a Scratch Pad, which automatically makes it a floating window. This allows us to completely hide and unhide the floating window with a single keystroke. This is a useful maneuver for allowing us to minimize our usage of our mouse and allow us to focus on what we need to.
My i3 Configuration
I use a Github repository called my toolbox where I store all my configuration files. I specifically store my i3-gaps configurations here. This directory houses a short script to factor out common configurations for different machines and allows me to build out a single config file for each machine.
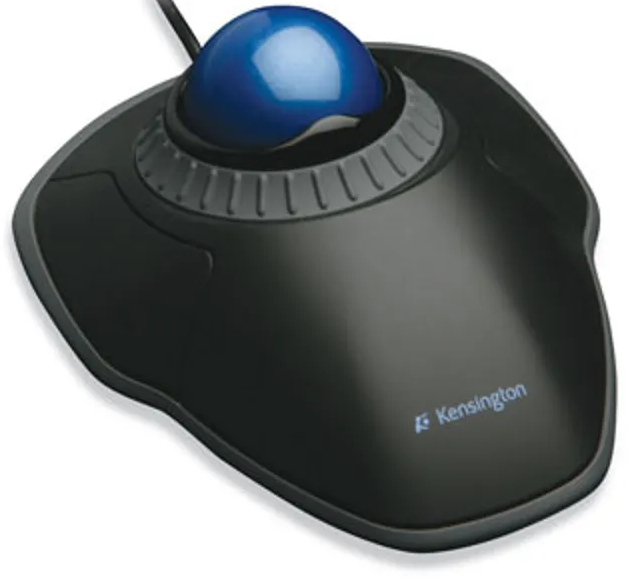
My Keyboard and Mouse
To further improve ergonomics, I’ve become quite fond of using a ball mouse and split ergonomic keyboard.
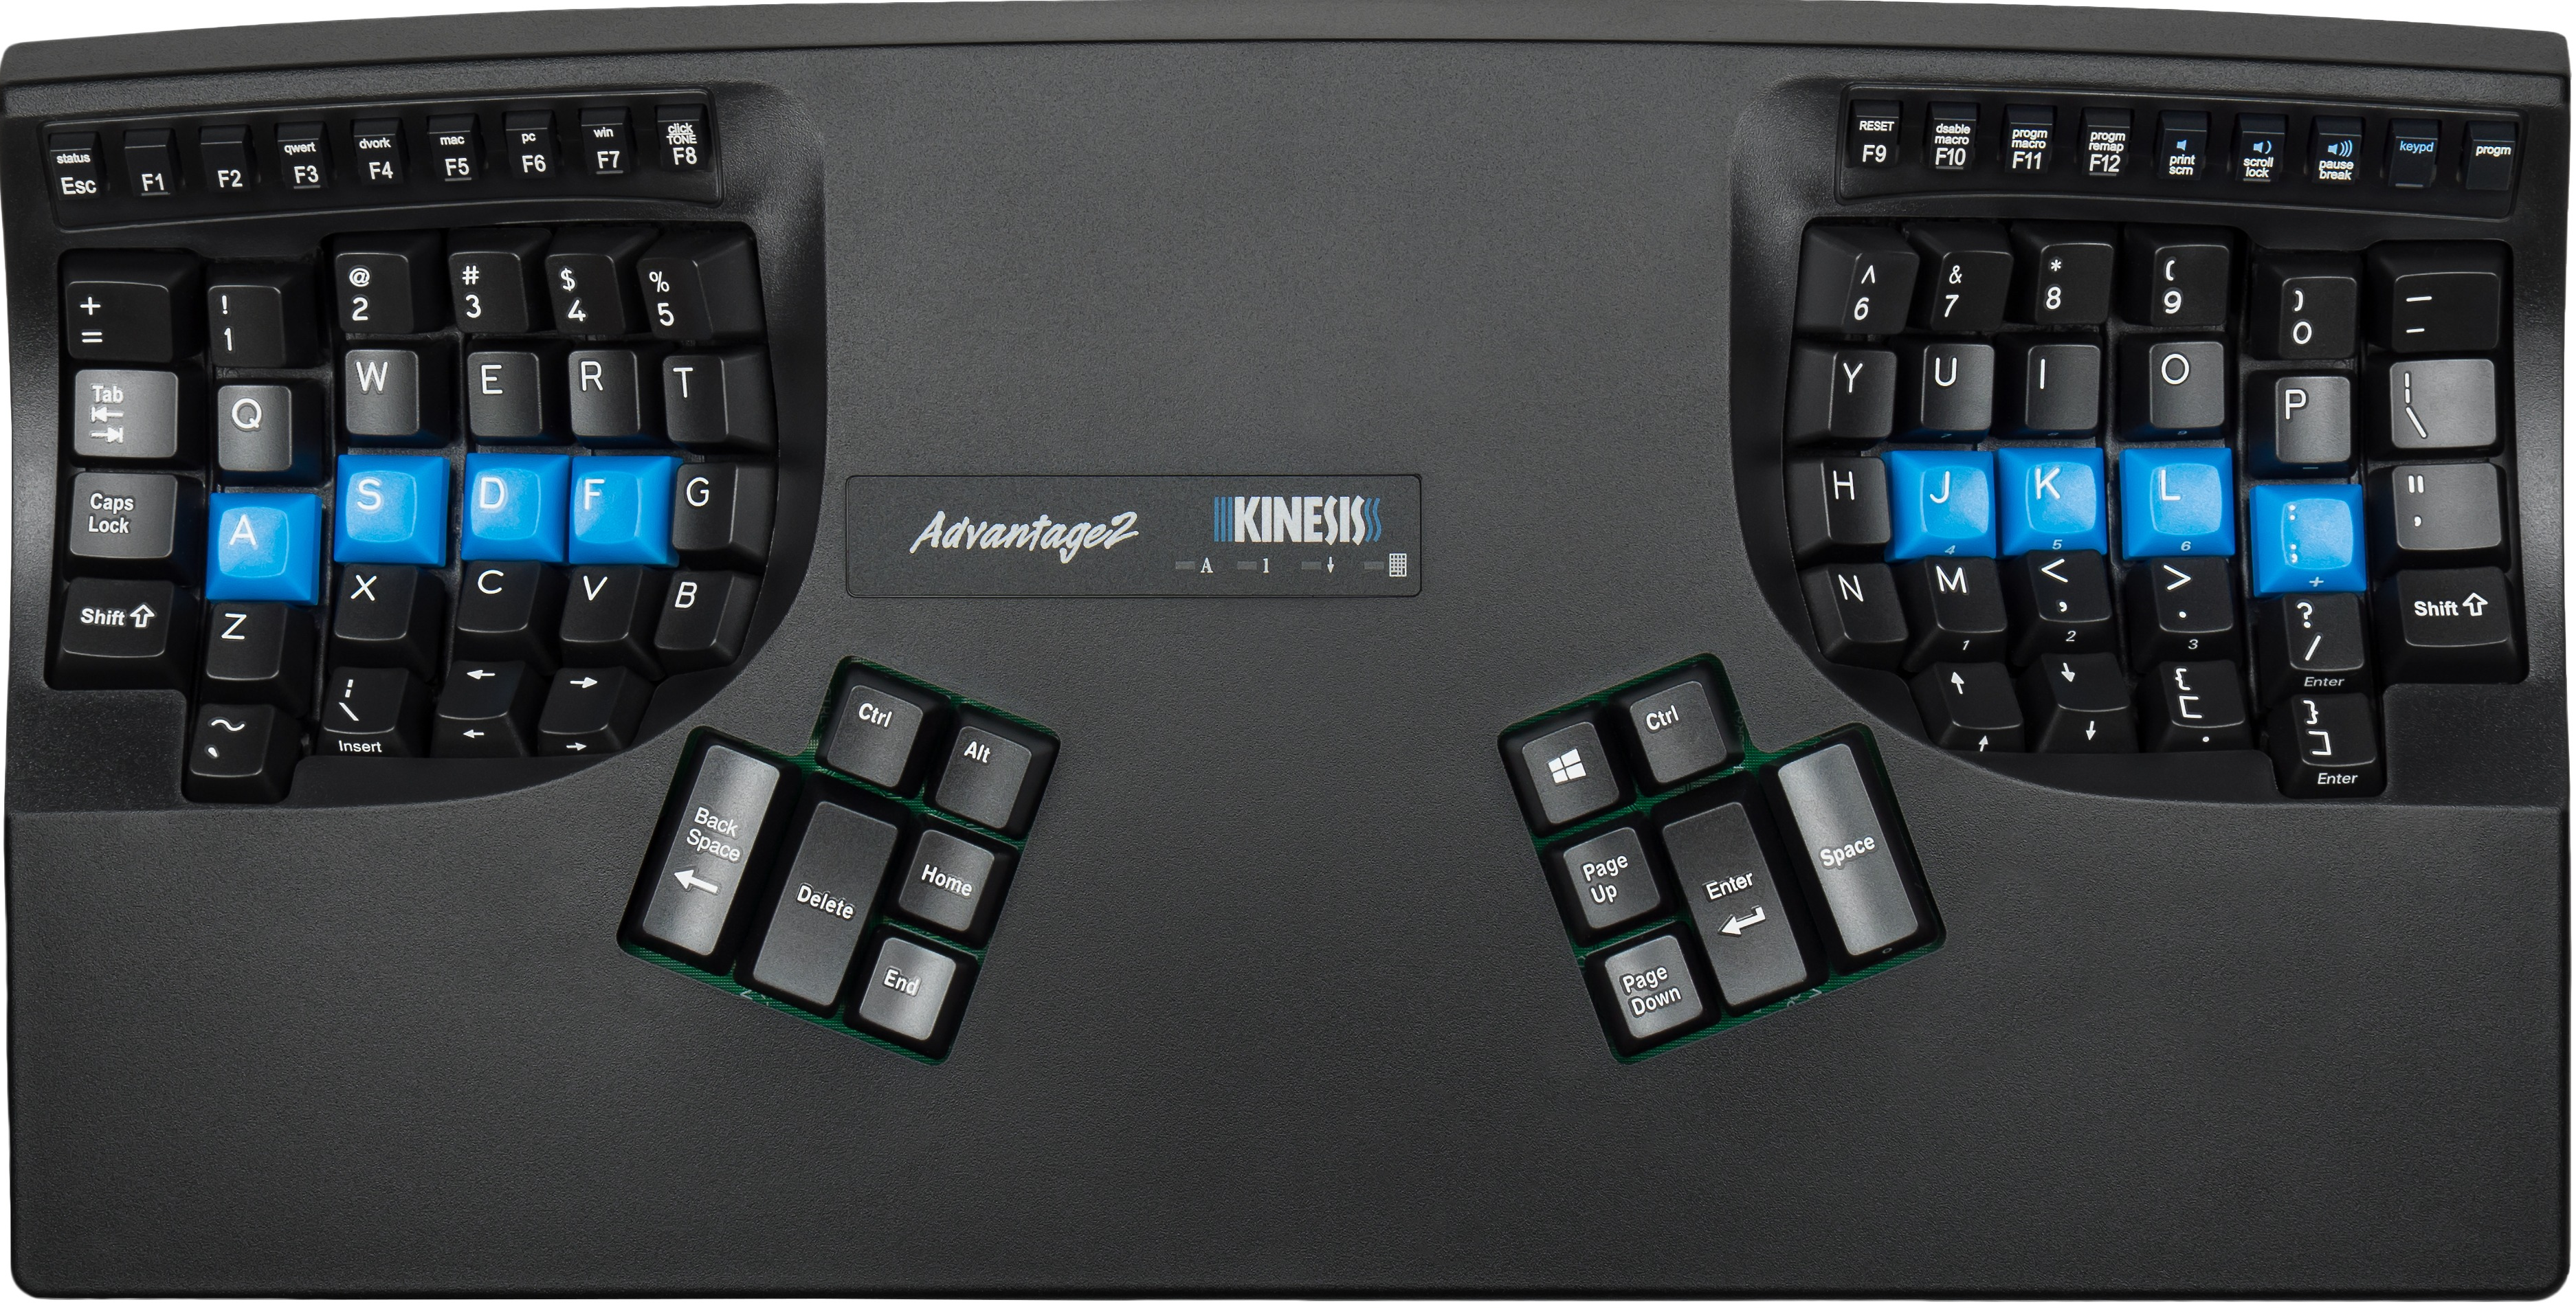
What’s nice about this keyboard is its concave, mechanically and is slightly rearranged. If you look at a standard keyboard and place your hands properly, you’ll notice that your two thumbs lie on the space bar and generally only are responsible for hitting that key. With this Kinesis Advantage keyboard, your thumbs are responsible for many more keys. Once you get used to the setup, you’ll find you can type faster and do so with less strain.