So what is a Franken Quest 2? A Franken Quest 2 is a series of modifications one can make to improve their Quest 2. Our goals are to improve the comfort of the device and prolong its battery life for longer play sessions.
First things first, we have to purchase the base platform which is the Oculus Quest 2. One can elect for the 128 GB version, but I liked the larger 256 GB storage size.
Comfort
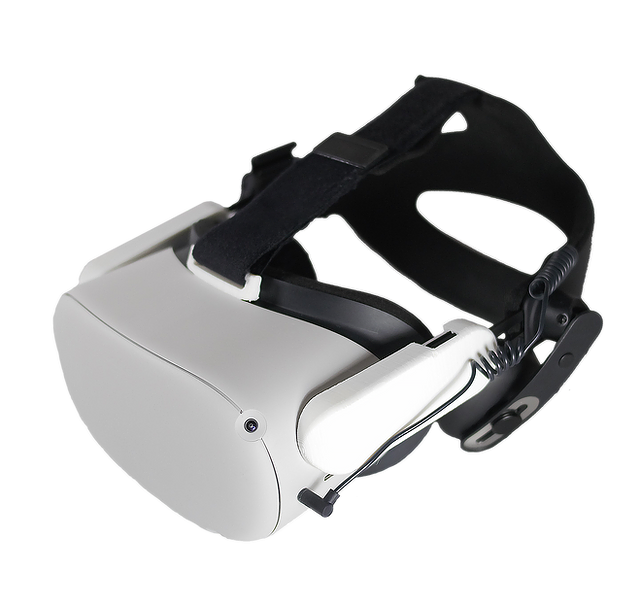
These modifications are essentially going to be recreating the Oculus Quest 2 Elite Strap with Battery and Carrying Case. I had read numerous stories of how the Elite Strap would break with little to no usage and how Facebook has been difficult to go replacements with. Here’s just one article detailing the issues. Supposedly they’ve fixed the issues, but I’ve still seen many posts online of how its still occurring. Whether that’s just old stock being circulated or the issue isn’t fixed, I’m not sure. Additionally, I’ve heard that the Carrying Case is thin cardboard and has a terrible zipper and is definitely not worth the $30.

So with that out of the way, lets discuss our first modification one should make. It is attaching the original Vive’s Deluxe Audio Strap (DAS) to the Oculus Quest 2.

To do this we must purchase both the DAS and an adapter. There are many 3d printable adapters available, but since I do not have a printer, I elected to purchase an adapter from NinjaPrint 3D on Etsy. Using this adapter, one can attach the DAS to the Quest 2, which makes it much more comfortable and adds in headphones. Here are the installation steps.

Battery Life (and a little comfort)
Now that we have comfort mostly addressed, we can focus on improving the length of our game sessions. We’re going to be strapping a battery to the back of our DAS and running a cable to our headset during gameplay. I’d recommend the Anker PowerCore 13000.

To attach this, we’ll again leverage a 3d printed component from Etsy, whose installation instructions were provided to be my the seller:
On your DAS strap, the padding at the rear of the headset is attached to the plastic of the strap with velcro. Pull the padding away from the plastic to create enough space so that the two velcro straps of the Anker PowerCore 13000 mount can pass between them.
Open the velcro straps on the Anker PowerCore 13000 battery mount, and hook the mount onto the lower plastic portion of the DAS strap. Note, There is a piece of 3M double sided foam tape on the Anker PowerCore 13000 that is optional, you can use it or not use it, totally up to you.
Once the mount is hooked onto the DAS strap, secure the velcro straps over the plastic of the DAS strap so that they lock the battery mount into place. Replace and secure DAS rear padding down over velcro straps into it’s original state. You should now have the mount installed correctly with the velcro straps of the battery mount passing between the plastic and padding of the DAS strap.
The clips are to hold/organize your usb cord on the strap between the mount and the headset if you wanted, they’re totally optional.
What’s nice is the battery acts as a counter weight, which makes the headset’s weight in the front a lot more balanced.

Miscellaneous Accessories
On top of the described upgrades above, I did purchase a lens inserts(which comes in prescription and non-prescription), a lens cover, a silicon cover and a DSLR Case. The case supposedly will fit our Franken Quest 2, with all its modifications, and have room for microfiber clothes, alcohol wipes etc.
Final Product
I’m still waiting for the lens inserts to arrive, but here’s what my Franken Quest 2 looks like with the modifications made:

Playing PCVR Games On Quest 2
Its important to note that if you have a Quest 2, you should really consider playing PC VR games on it. See this post on how to do that.